Sunday, December 16, 2012

ONE STEP FORWARD, ONE STEP BACK

Mr. T and I got the Walden hubs installed today, which means the front suspension is just about 100% buttoned up. They're very nice hubs and will allow for the big Buick brakes with the 45-fin drums. So there's our one step forward.
We then turned to the rear suspension and came to the realization that the rear ladders aren't going to work, given the lower ride height and my desire to have all of my 6'5"frame riding down in the car rather than on it. So it was one step back. Looks like we're gonna have to go with a four link. We realized we may have to modify the rails to get me comfortably down into the driver's seat area. Sometimes being a 6'5" Sasquatch really sucks. Of course, I'd rather know that now and make the proper adjustments now to fit comfortably in the car. Will post more as the new plan unfolds.

Wednesday, December 5, 2012

WALDEN'S, HOME OF JAKE JACOBS


Melinda, Bobby and their lovely little future rodder.
Called Walden's Speed Shop today and spoke with Melinda regarding the Buick adaptor hubs made by her husband, Bobby. You'd be hard-pressed to find a nicer person in the hobby. The hubs were in stock, but they were waiting for bearings. The hubs will be on their way here by middle of next week, which means all of the front end parts will be on hand to complete the front suspension using my big, aluminum Buick drums. So just days from now the front suspension will be able to support the weight of the drivetrain. Next, Mr T. will be moving on to the rear ladder bar suspension, using the parts we ordered from Pete and Jakes. Proving it really is a small world, Jake Jacobs, of Pete and Jakes firm, is a member of Walden's crew and has a line of parts under the Jitney by Jake moniker. One of which is an old school alternator bracket for small block Chevys that might come in handy once we're ready to get the engine accessories in place.

Sunday, December 2, 2012

Saturday, November 24, 2012

CENTER CONSOLE REFERENCE

In thinking about the roadster's interior, I like the idea of separating the driver and passenger seats with a waterfall-style center console dropping down from the rear package tray. 

This first shot is from Aaron Grote's Lunar Lander.
This shot is a Tom Culbertson built interior. Very cool. 

This is a close up of "El Tiki's" center console.
I'm very impressed by this set-up. I hope to do something similar, but equally unique.
Here's a concept drawing of Nick Garfias' 29 coupe interior.

Friday, November 23, 2012

VINTAGE SPEAKER CLOTH

I had an epiphany today when thinking about incorporating a stereo/MP3 system into the roadster. Wouldn't it be cool to use vintage speaker cloth material in the interior? Actually, I think this stuff is so cool it could even be used as door panel material. Fender Turquoise White Silver Grill cloth.

Thursday, November 22, 2012

PEDAL ASSEMBLY

Well, I've sold off the pedal assembly I'd purchased from Pete & Jakes and I'm planning on using this set-up instead, which has just been created by Eric Peratt and his team of fabricators at Pinkee's.


Wednesday, November 21, 2012

VALVE COVERS


Granted, I already have a pair of Cal Custom finned valve covers for my 327 but I must confess, PML makes some very tasty valve covers.

FRONT HUBS

d tough!


H
Here are the hubs I'll be getting for the roadster that allow Buick front drums to be run with my Ford spindles. I'll circle back to reveal the source, once I've ordered my set.
 
Here's a Buick drum tucked into the backside of the front rim. 

Tuesday, November 20, 2012

REAR SUSPENSION PARTS ORDERED

Ordered the rear suspension parts from Jason at Pete& Jakes on Saturday. What a great company. Jason actually took back an unused pedal assembly and brake cylinder that I bought years ago and applied the refund towards the ladder bar rear suspension kit PN# 2011 for my roadster. It's not often that I get treated this well by a company so from here on in, if Pete & Jakes carries the parts, they've got my business.


FRONT END PROGRESS

Mr. T got the front axle mounted and cut down the wishbones to perfect size. 

Here's the suspension supporting the weight of the front end. 

As you an see here, the front frame rails end just before the axle. 


Tuesday, November 13, 2012

SHORN HORNS

Whack, whack. Suddenly those frame horns ain't looking so horny. 

Here you can see the relationship between the spring, the axle and the grill shell. Tasty. 


The Model A's frame got a little more compact, as Mr. T shortened the front rails. If all goes as planned, the drop axle will tuck below and behind the grill shell. Very excited. Also loving the front tires, recommended by Eric @ Riley Auto, who sold me the USA-made 4" CE Drop Axle and the front spring and spindles. Highly recommended.

Sunday, November 11, 2012

PROGRESS SHOTS

Here are a few progress shots now that the spindles, drop axle, spring and front tires arrived. Sorry for the poor photo quality. I'm a crappy cell phone photographer.

The new tires arrived and got mounted today.

The Chassis Engineering 4" drop axle mocked up.


Note the big n' little rear/front tire effect.


The 560X15s with 2&1/4 whitewalls.


Saturday, November 10, 2012

A RARE PLATE


After months of scouring swap meets, antique shops and estate sales, I finally found a pair of decent 1929 plates and sought to find a restorer for them. A Google search for someone in Denver drew me to Larry Scott, who has been an active member of the car scene for a couple of decades. I called him and arranged to meet with him to get a bid for restoring the plates I'd found. During the course of our conversation, Larry mentioned that CO offered different sized plates in 29 and that he had one of the lowest numbers that they offered, a three-digit plate. Hearing that made me really want a smaller plate, given the compact size of my model A. I asked him to quote me a price for the small plate and before I knew it, I was the proud owner of the beauty you see here, restored by none other than Larry. Once the roadster gets closer to the road, I'll order collector car plates for it to carry in trunk of the car, and run the plate you see here on the rear. Should anyone be interested in a good plate restorer, here's Larry's contact info:


          Larry Scott
Denver, Colorado
Phone: (303) 433-9504
Repairs holes, restores and repaints vintage plates

Sunday, November 4, 2012

FIRST THINGS FIRST


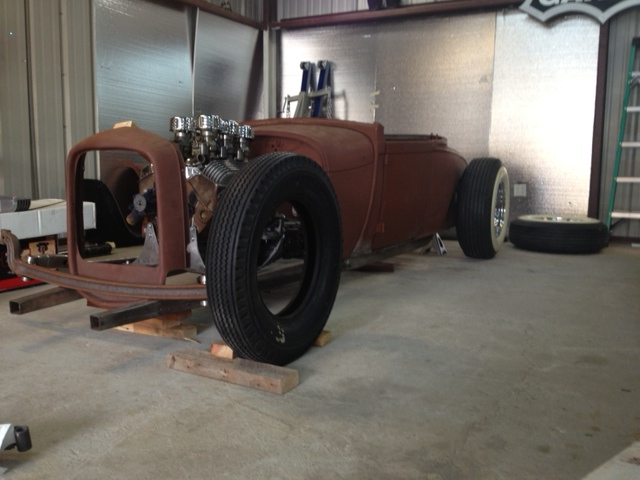
Here's the basic order the build will follow:

1. Install front suspension
2. Fabricate rear suspension
3. Hang pedals and set-up steering box for cowl steering
4. Fabricate floors, including transmission tunnel, seating position
5. Mount grill shell, radiator and fabricate shroud for manual fan
6. Mount headlights and tail lights
7. Wire car, plumb brake lines, run fuel lines
8. Mount seats, gauges, windshield
9. Sound deadening, upholstery, sound system?
10. Take car back apart and perform all necessary powder-coating and plating.
11. Paint, pin stripe, etc. 
12. Reassemble. 

Thursday, November 1, 2012

FRONT END PARTS


Just ordered the front end suspension part for Eric @ 
Riley Automotive in Commerce City, CO.

PARTS LIST

Chassis Engineering 1932 heavy style Forged axle 47" 2 1/4" boss Posies super slide front spring,
29" forged spindles,with king pins fitted 
Spindle nuts and washers
Spring shackles 13/4" wide 3/4" and 3/4" bushing 
Pete and Jakes Rod shocks Covered 14.25-9.25 subtotal

Wednesday, October 31, 2012

INTERIOR MOTIVES

With fabrication back on track, I feel as if I'm freed up to think about finish details, like the interior.
Having had the luxury of hanging out with Sean a couple weekends back, I'm hoping I can get him to do the interior when the time comes. I consider the interior a huge opportunity to do something that's different, yet in keeping with a sixties custom vibe. The rectangular steering wheel will, of course, go a long way towards making the interior unique. The Desoto gauges will add uniqueness and because the faces are white and the numbers and needles are gold, it starts to reinforce the complimentary colors that will coordinate with the light turquoise pearl. I'd like the seats to be fairly simple and low profile, but with some bolstering for comfort and support the driver when cornering. I'm leaning towards white pearl with subtle gold accents. I'd like to have a compact center console that would second as an armrest. I'd also like som late fifties, early sixties arm rests on the interiors or the doors and some pockets on the doors, to store small items. Sean Johnstun and I talked about how cool it would be to have a waterfall grill between the seats, like the rear seat of my 65 Riviera had, which could second as a speaker for a hidden MP3 players.


PARTS LIST FOR FRONT END


This is one of those posts that is simply a parts list of what is needed. Feel no need to read on.  

FRONT SUSPENSION PARTS NEEDED

1. Axle- The 4" drop one on the top of the I beam page that is 47" wide and 35" perch to perch. $256.50
2. Front spring- 1056A the narrow on 29" eye to eye $136.03
3. Reverse eye main leaf- 1055A 29" eye to eye $40.04
4. Spindles- We need them to fit the lincoln backing plates the riley auto sells (CE Forged Spindles bushing installed $264.50
5. Spring shackles- To fit the front spring (AU 2203? Will work with 1056A? $38.00)
6. King pin set- Whatever we need to put spindles onto the axel you buy (PN: ABC-123 $43.95 Will work with 4” Chassis Engineering 32 style heavy axle 47” wide. 35” wide perch centers, 2&1/4 perch boss)
If we get this stuff and have decided on the tire size I can finish and get the front end under its own weight. That’s huge!
TIRES: from Coker: Firestone 3&1/4” whitewall – 670-15 $376.00 per pair


ADDENDUM: After looking at examples of Big and littles, I found a much shorter tire that will work with the 5.5" front chrome reverses. US Royal 560-15's with 2&1/4" whitewalls from Coker. They're on their way. 

Monday, October 29, 2012

LET THE FABRICATION BEGIN

With the roadster now here in Denver, and a talented fabricator who I'll call Mr. T on the case, the roadster will soon be having its 9" rear suspended to the frame. We're looking at creating a four link suspension system for the back. We're also experimenting with front tires to make sure we get the visual rake The challenge is figuring out the ideal front tire to fit on the 5.5 inch front chrome reverses, and making sure that tire has a wide enough whitewall to compliment the rear tires. Once we get the front tires figured out, we'll be setting up the front suspension, too.


327 REASONS

It's been a while since I talked about the engine for my roadster. It's a roller cam equipped vintage 327 that has been balanced and blueprinted. I found the engine on Craigslist and it was frankly more than I was looking for. In fact, when I heard how much cam it was running, I initially balked at the idea of buying it. But it was built well, had recent receipts, and after researching the cost of a cam change, I made an offer and it was accepted. I got a hold of some vintage 2.02 heads for it and had Larry @ Performance Automotive set them up with roller rockers and a mild porting job. The cam I chose is a Competition Cams 270HR, which creates plenty of manifold at idle, a key consideration given the fact that I'm going to be running multiple carbs. The photo is strictly a mock up and reflects untold hours of de-burring that I painstakingly performed in my garage where the picture was snapped.


Wednesday, October 24, 2012

A LONG-DISTANCE DRIVE

Here's a shot of mi amigo, David Hepp, who was nice enough to pilot a 16' moving truck from Austin to Denver containing all the parts to my Model A. Below, I was showing him my vintage 6X2 intake with 94s. When the time comes to have the carbs gone through and the linkage set up, I'll likely go with Dick's Hot Rod Carbs, which comes highly recommended by the HAMB.


Sunday, October 21, 2012

TIRE RESEARCH


I did some more research on the Nick Garfias roadster. The Rod and Custom article lists his tire sizes, but not wheel widths. He’s running 16s front and back. I cross-referenced his tire sizes with Coker’s site and found wheel width recommendations.

NICK’S ROADSTER:

REARS: 7.50-16 with a diameter of 31.48” that recommends a 5”-6” wheel
FRONTS: 6.50-16 with a diameter of 29.1 that recommends a 4.5”-6” wheel

So the difference in diameter between his fronts and backs are 2.37”

MY ROADSTER:

My L78-15’s have diameter of 29.3 and recommended is a 6”-8.5” wheel
(My rears are 8”)

I looked up 15” wide whitewalls for the front tires and found these on Coker’s site

Firestone makes a 6.70-15 with 3.35” whitewalls that is 28.58 in diameter and recommended wheel size is 5”-6” (My fronts are 5.5”) These tires would be smaller than the rears by .73”, yet fit on a 6” rim, which in theory would mean the front wheels I got form Sean may be usable.

Another option is a G78-15 Coker with 3&1/4 WW with a diameter of 27.68", which is 1.62" smaller than the L78-15s on the rear. 


FAT LUCKY'S WAS IN THE HOUSE

We had the good fortune of spending the weekend with Sean Johnstun aka Fat Lucky's, who stopped by to bring the chrome reverse wheels and rear tires for the roadster. Sean was making a trek from his old home in Austin to Kansas and back to Burbank, CA, where he's setting up shop with a buddy who does high-end Merecedes work. While here, Sean took a run over to the secret bunker where work on the roadster is resuming. While there, we had a chance to visit and I asked him to weigh in for the design direction of the roadster, particularly its interior. As Sean soon found out, I had a multitude of choices for gauges. The only thing I knew for sure is that I wanted to run original equipment gauges form a fifties car. Sean put in a strong recommendation that I use the Desoto gauges I pulled out of my favorite wrecking yard in Seguin, Texas a couple years ago. 
Sean was a big fan of the white faces and  gold accents on them. He felt that the subtle colors would key beautifully off of the turquoise exterior paint and play nicely against my plan for a white pearl interior. While on the subject, I asked him what he would do with the interior. His answer? White pearl with gold piping, to play off of the gauges. That was exactly the kind of sage advice I was looking for. We also talked about my plan for a padded center console and interior door panels with late fifties or early sixties arm rests. If all goes well, it's my intention to cut Sean loose on the interior once the car is up and running. Naturally, we're a long ways out from that stage, but it's nice to have the best upholstery guy on the planet weigh in. Sean left Denver Sunday headed towards Sante Fe in his '42 Dodge truck.  What he left behind was a ton of good advice about keeping the car's interior relatively simple, which is a fine art in and of itself.

When the time comes to have the gauges rebuilt, Redline Gauges will likely get the nod.

INITIAL MOCK-UP-- DENVER

Here's the initial mock up of the roadster now that it's here in Denver. The rear wheels and tires are L78-15's on Pete Paulsen 8" Chrome reverse wheels. 

Here's the 327 with it's 6X2 manifold and Magneto distributor. 


Front mock-up of the front end.


Friday, October 19, 2012

BUILD BACK ON

The roadster build is back on, and in a big way. Last week, I rented a moving van, loaded up my '29 roadster and delivered it to a secret bunker here in Denver, where a talented builder is going to be plying his talents to it over the coming winter. In conversation with said builder, I was asked to submit shots of a handful of cars that came closest to what I'm envisioning for my car, which is to replicate an early sixties custom. I happened to share the handful of pics I was sending to the builder with my employee, Rob, and he offered to retouch one of them to be close in color to what I want for my car. So with apologies to Nick Garfias, the owner of this beautiful '29 roadster, I present a light turquoise metallic photoshopped version of his car -- and what I want my car to be.


Thursday, September 20, 2012

CATALYZED CLEARCOAT & PAINTER

Just when I thought the steering wheels were done, my 29's clearcoat started melting in the hot sun.Unacceptable. I went back to the Painter's Supply and was informed that a catalyzed clear would be necessary for something that would receive as much handling and direct sunlight as a steering wheel. Live and learn. I'm off to find a real body shop with a real booth and proper ventilation to finish the wheels properly. I'll update once I've repaired the wheels. I was referred to a local painter who is reputable and a good guy:

David 720-299-3222

Tuesday, September 4, 2012

THE WHEEL

Here's my wheel painted PPG Light Turquoise Pearl. This is the color I'm thinking of painting my roadster's exterior. I'm very happy with how the color looks. All that's left is to find a local body shop to spray a nice coat of catalyzed clear.